Create a Generic IOC#
In this tutorial you will learn how to take an existing support module and create a Generic IOC that builds it. You will also learn how to embed an example IOC instance into the Generic IOC for testing and demonstration.
This is a type 2. change from the list at Types of Changes.
Lakeshore 340 Temperature Controller#
The example we will use is a Lakeshore 340 temperature controller. This is a Stream Device based support module that has historically been internal to Diamond Light Source.
See details of the device: lakeshore 340
Note
DLS has an existing IOC building tool XML Builder for traditional
IOCs. It has allowed DLS to a have concise way of describing a beamline for many
years. However, it requires some changes to the support modules and for this
reason DLS maintain’s a fork of all upstream support modules it uses.
epics-containers is intended to remove this barrier to collaboration and
use support modules from public repositories wherever appropriate. This
includes external publishing of previously internal support modules.
The first step was to publish the support module to a public repository, it now lives at:
DiamondLightSource/lakeshore340
The project required a little genericizing as follows:
add an Apache V2 LICENCE file in the root
Make sure that configure/RELEASE has an include of RELEASE.local at the end
change the make file to skip the
XML Builder/etc folder
The commit where these changes were made is 0ff410a3e1131
Something like these steps may be required when publishing any facility’s previously internal support modules.
Create a New Generic IOC project#
By convention Generic IOC projects are named ioc-XXX where XXX is the
name of the primary support module. So here we will be building
ioc-lakeshore340.
Much like creating a new beamline we have a template project that can be used as the starting point for a new Generic IOC. Again we will create this in your personal GitHub user space.
Steps#
Go to your GitHub account home page. Click on ‘Repositories’ and then ‘New’, give your new repository the name
ioc-lakeshore340plus a description, then click ‘Create repository’.From a command line with your virtual environment activated. Use copier to start to make a new repository like this:
pip install copier
# this will create the folder ioc-lakeshore340 in the current directory
copier copy gh:epics-containers/ioc-template --trust ioc-lakeshore340
Answer the copier template questions as follows:
🎤 A name for this project. By convention the name will start with ioc- and
 have a lower case suffix of the primary support module. e.g.
 ioc-adsimdetector
    ioc-lakeshore340
 🎤 A One line description of the module
    Generic IOC for the lakeshore 340 temperature controller
 🎤 Git platform hosting the repository.
    github.com
 🎤 The GitHub organisation that will contain this repo.
    YOUR_GITHUB_ACCOUNT
 🎤 Remote URI of the repository.
    git@github.com:YOUR_GITHUB_ACCOUNT/ioc-lakeshore340.git
Make the first commit and push the repository to GitHub.
cd ioc-lakeshore340
git add .
git commit -m "initial commit"
git push -u origin main
Get the Generic IOC container built, open the project in vscode and launch the devcontainer.
./build
# DLS users make sure you have done: module load vscode
code .
# reopen in container
As soon as you pushed the project, GitHub Actions CI will start building the project. This will make a container image of the template project, but not publish it because there is no release tag as yet. You can watch this by clicking on the Actions tab in your new repository.
You might think building the template project was a waste of GitHub CPU. But, this is not so, because of container build cacheing. The next time you build the project in CI, with your changes, it will re-use most of the steps and be much faster.
Prepare the New Repo for Development#
There are only three places where you need to change the Generic IOC template to make your own Generic IOC.
Dockerfile - add in the support modules you need
README.md - change to describe your Generic IOC
ibek-support - add new support module recipes into this submodule
To work on this project we will use local a developer container. All changes and testing will be performed inside this developer container.
Once the developer container is running it is always instructive to have the /epics folder added to your workspace:
File -> Add Folder to Workspace
Select
/epicsClick cancel if you see an error
File -> Save Workspace As…
Choose the default
/workspaces/ioc-lakeshore340/ioc-lakeshore340.code-workspace
Note that workspace files are not committed to git. They are specific to your local development environment. Saving a workspace allows you to reopen the same set of folders in the developer container, using the Recent list shown when opening a new VSCode window.
Now is a good time to edit the README.md file and change it to describe your Generic IOC as you see fit. However, the template will have placed some basic information in there for you already.
Initial Changes to the Dockerfile#
The Dockerfile is the recipe for building the container image. It is a set of steps that get run inside a container during the container image build phase. The initial container filesystem at the start of a build is determined by a FROM line at the top of the Dockerfile.
In the Generic IOC template the FROM line gets a version of the epics-containers base image. It then demonstrates how to add a support module to the container image. The iocStats support module is added and built by the template. It is recommended to keep this module as the default
behaviour in Kubernetes is to use iocStats to monitor the health of the IOC.
Thus, you can start adding support modules by adding more COPY and RUN lines to the Dockerfile. Just like those for the iocStats module.
The rest of the Dockerfile is boilerplate and for best results you only need to remove the comment below and replace it with the additional support modules you need. Doing this means it is easy to adopt changes to the original template Dockerfile in the future.
################################################################################
#  TODO - Add further support module installations here
################################################################################
Because lakeshore340 support is a StreamDevice we will need to add in the required dependencies. These are asyn and StreamDevice. We will
first install those inside our devcontainer as follows:
# open a new terminal in VSCode (Terminal -> New Terminal)
cd /workspaces/ioc-lakeshore340/ibek-support
asyn/install.sh R4-42
StreamDevice/install.sh 2.8.24
This pulls the two support modules from GitHub and builds them in our devcontainer. Now any IOC instances we run in the devcontainer will be able to use these support modules.
Next, make sure that the next build of our ioc-lakeshore340 container image will have the same support built in by updating the Dockerfile as follows:
COPY ibek-support/asyn/ asyn/
RUN asyn/install.sh R4-42

COPY ibek-support/StreamDevice/ StreamDevice/
RUN StreamDevice/install.sh 2.8.24
The above commands added StreamDevice and its dependency asyn.
For each support module
we copy it’s ibek-support folder and then run the install.sh script. The
only argument to install.sh is the git tag for the version of the support
module required. ibek-support is a submodule used by all the Generic IOC
projects that contains recipes for building support modules, it will be covered
in more detail as we learn to add our own recipe for the lakeshore340 below.
You may think that there is a lot of duplication here e.g. asyn appears 3 times. However, this is explicitly done to make the build cache more efficient and speed up development. For example we could copy everything out of the ibek-support directory
in a single command but then if I changed a StreamDevice ibek-support file the build would have to re-fetch and re-make all the support modules. By only copying the files we are about to use in the next step we can massively increase the build cache hit rate.
Note
These changes to the Dockerfile mean that if we were to exit the devcontainer, and then run ./build again, it would would add the asyn and
StreamDevice support modules to the container image. Re-launching the devcontainer would then have the new support modules available right away.
This is a common pattern for working in these devcontainers. You can try out installing anything you need. Then once happy with it, add the commands to the Dockerfile, so that these changes become permanent.
Prepare The ibek-support Submodule#
Now we are ready to add the lakeshore340 support module to our project. In
order to do so we must first add a recipe for it to ibek-support.
The ibek-support submodule is used to share information about how to build
and use support modules. It contains three kinds of files:
install.sh - These are used to fetch and build support modules. They are run from the Dockerfile as described above.
IBEK support module
definitions: These are used to help IOCs build their iocShell boot scripts and EPICS Database from YAML descriptions.PVI definitions: These are used to add structure to the set of PV’s a device exposes. This structure allows us to auto-generate engineering screens for the device. See epics-containers/pvi.
ibek-support is curated for security reasons, therefore we need to work with
a fork of it so we can add our own recipe for lakeshore340. If you make changes
to ibek-support that are generally useful you can use a pull request to get them
merged into the main repo.
Perform the following steps to create a fork and update the submodule:
uncheck
Copy the main branch onlyclick
Create Forkclick on
<> Codeand copy the HTTPS URL
cd /workspaces/ioc-lakeshore340
git submodule set-url ibek-support <PASTE *HTTPS* URL HERE>
git submodule update
cd ibek-support
git fetch
git checkout tutorial-KEEP # see note below
git remote -v # verify that the origin is your fork
cd ..
We are using the tutorial-KEEP branch which is a snapshot of the ibek-support state
appropriate for this tutorial. Normally you would use the main branch and
then create your own branch off of that to work in.
Note
IMPORTANT: we used an HTTPS URL for the ibek-support submodule, not
a SSH URL. This is because other clones of ioc-lakeshore340 will not
be guaranteed to have the required SSH keys. HTTPS is fine for reading, but
to write you need SSH. Therefore add the following to your ~/.gitconfig:
[url "ssh://git@github.com/"]
        insteadOf = https://github.com/
This tells git to use SSH for all GitHub URLs, when it sees an HTTP URL.
The git submodule allows us to share the ibek-support definitions between all
ioc-XXX projects but also allows each project to have its copy fixed to
a particular commit (until updated with git pull) see
https://git-scm.com/book/en/v2/Git-Tools-Submodules for more information.
Create install.sh For The lakeshore340#
The first file we will create is the install.sh script for lakeshore340. This is a simple script that fetches the support module from GitHub and builds it.
These scripts draw heavily on the ibek tool to do tasks that most support modules require. They are also are as close to identical as possible for simple support modules.
IMPORTANT points to note are:
Although we are using
ibekwe are really just automating what an EPICS engineer would do manually. This is very much using the vanilla EPICS build system that comes with EPICS base, along with the vanilla Make and Config files that come with each support module. These steps are:-make sure we have the necessary system dependencies installed
fetch a version of the support module from GitHub
add a RELEASE.local to enable dependency resolution
optionally add CONFIG_SITE.local to apply settings for the build environment
run make to build the support module
take a note of the dbds and libs that we build so that we can use them to make our IOC instance later
This is a bash script so although we encourage a very standard structure, you can do anything you like. For example this support module has to compile a 3rd party library before it can build the support module itself. ADAravis install.sh
To make your lakeshore340 install.sh script:
cd /workspaces/ioc-lakeshore340/ibek-support
mkdir lakeshore340
cp iocStats/install.sh lakeshore340/install.sh
code lakeshore340/install.sh
Now edit the install.sh script to look like the code block below.
The changes required for any support module you care to build would be:
change the NAME variable to match the name of the support module
add in
ibek support apt-installlines for any system dependencies. These can be for the developer stage or the runtime stage or both.change the
ibek support add-*lines to declare the libs and DBDs that this module will publish.add extra release macros for RELEASE.local (the RELEASE macro for the current support module is added automatically). Or add CONFIG entries for CONFIG_SITE.local as required. None of these were required for lakeshore340. To see how to use these functions see
ibek support add-release-macro –help
ibek support add-to-config-site –help
#!/bin/bash

# ARGUMENTS:
#  $1 VERSION to install (must match repo tag)
VERSION=${1}
NAME=lakeshore340
FOLDER=$(dirname $(readlink -f $0))

# log output and abort on failure
set -xe

# doxygen is used in documentation build for the developer stage
ibek support apt-install --only=dev doxygen

# get the source and fix up the configure/RELEASE files
ibek support git-clone ${NAME} ${VERSION} --org https://github.com/DiamondLightSource/

ibek support register ${NAME}

# declare the libs and DBDs that are required in ioc/iocApp/src/Makefile
# None required for a stream device ------------------------------------
#ibek support add-libs
#ibek support add-dbds

# compile the support module
ibek support compile ${NAME}
# prepare *.bob, *.pvi, *.ibek.support.yaml for access outside the container.
ibek support generate-links ${FOLDER}
Having made these changes you can now test the script by running it:
cd /workspaces/ioc-lakeshore340/ibek-support
chmod +x lakeshore340/install.sh
lakeshore340/install.sh 2-6-2
You now have lakeshore340 support in your developer container. Let’s go ahead and add that into the Dockerfile:
COPY ibek-support/lakeshore340/ lakeshore340/
RUN lakeshore340/install.sh 2-6-2
This means you can compile an IOC with lakeshore340 support in this container but we don’t yet have a way to generate startup scripts and EPICS Databases for the instances. We will do that next.
Create Support YAML for the lakeshore340#
When making an IOC instance from a Generic IOC, the instance needs to supply
an iocShell startup script and an EPICS Database. You can supply hand
crafted st.cmd and ioc.subst files for this purpose. The Generic IOC
we have made above is already capable of using such files.
For this exercise we will use the full capabilities of ibek to generate
these files from a YAML description of the IOC instance. To do this we need
to create a YAML file that describes what the instance YAML is allowed to
make.
TODO: a detailed description of the YAML files’ structure and purpose should
be included in the ibek documentation and linked here.
The current version of this is here
entities
but it is rather out of date.
To create an ibek support YAML file we need to provide a list of definitions .
Each definition gives:
a name and description for the
definitiona list of arguments that an instance of this
definitionmay supply, with each having:a type (string, integer, float, boolean, enum)
a name
a description
optionally a default value
A list of database templates to instantiate for each instance of this
definition- including values for the Macros in the templateA list of iocShell command line entries to add before or after
iocInit
In all of the fields Jinja templating can be used to combine the values of
arguments into the final output. At its simplest this is just the name of
an argument in double curly braces e.g. {{argument_name}}. But, it can
also be used to do more complex things as a Python interpreter is evaluating
the text inside the curly braces and that interpreter has the values of
all the definition arguments available in its context.
See https://jinja.palletsprojects.com/en/3.0.x/templates/
Note
IMPORTANT: the file created below MUST have the suffix .ibek.support.yaml.
This means it is a support yaml file for ibek. This is important because
when install.sh calls ibek support generate-links it will look for
files with this suffix and make links to them in the ibek-defs folder.
In turn when you run ibek ioc generate-schema it will look in the
ibek-defs folder for all the support definition YAML files and combine
them into a single schema file.
To make a lakeshore340 YAML file, go to the folder
/workspaces/ioc-lakeshore340/ibek-support/lakeshore340/
and create a file called lakeshore340.ibek.support.yaml. Add the following
contents:
# yaml-language-server: $schema=https://github.com/epics-containers/ibek/releases/download/1.6.2/ibek.support.schema.json

module: lakeshore340

defs:
  - name: lakeshore340
    description: |-
      Lakeshore 340 Temperature Controller
      Notes: The temperatures in Kelvin are archived once every 10 secs.
    args:
      - type: str
        name: P
        description: |-
          Prefix for PV name

      - type: str
        name: PORT
        description: |-
          Bus/Port Address (eg. ASYN Port).

      - type: int
        name: ADDR
        description: |-
          Address on the bus
        default: 0

      - type: int
        name: SCAN
        description: |-
          SCAN rate for non-temperature/voltage parameters.
        default: 5

      - type: int
        name: TEMPSCAN
        description: |-
          SCAN rate for the temperature/voltage readings
        default: 5

      - type: id
        name: name
        description: |-
          Object and gui association name

      - type: int
        name: LOOP
        description: |-
          Which heater PID loop to control (Default = 1)
        default: 1

    databases:
      - file: $(LAKESHORE340)/db/lakeshore340.template
        args:
          name:
          SCAN:
          P:
          TEMPSCAN:
          PORT:
          LOOP:
          ADDR:

    pre_init:
      - value: |
          epicsEnvSet "STREAM_PROTOCOL_PATH", "$(LAKESHORE340)/lakeshore340App/protocol/"
This file declares a list of arguments, one for each of the database template
macros that it needs to substitute. It then declares that we need to instantiate
the lakeshore340.template database template and passes all of the arguments
verbatim to the template.
Next, it declares that we need to add a line to the iocShell startup script that allows the IOC to find the module’s StreamDevice protocol files.
Note that in the list of DB args or in the startup lines we can use combinations of arguments to make the final output.
e.g. to make a more descriptive PV prefix we could use:
databases:
  - file: $(LAKESHORE340)/db/lakeshore340.template
    args:
      P: "{{P + ':' + name + ':'}}"
Finally, also note that the top line refers to a schema file. This is the global
ibek schema for support module definition YAML. A single schema is used
for all support modules and is published along side the latest release of ibek.
This means that a schema aware editor can provide auto-completion and validation
for your support module YAML files. The VSCode extension here
https://marketplace.visualstudio.com/items?itemName=redhat.vscode-yaml
adds this capability.
Note
Because this is a DLS module originally, it has an etc/builder.py file
that is used by the XML Builder tool. ibek has a converter
that will translate this file into an ibek YAML file. Only DLS users
can take advantage of this because it needs access to all the dependent
DLS support module forks to work. See Builder2ibek.support Conversion Tool
Register the Support YAML#
When a Generic IOC is built, each support module will register its support YAML by linking it into the folder /epics/ibek-defs. This is so that the ibek tool can find all the support module definitions and combine them into a single schema file. The schema file is then to validate your IOC instance YAML as you are editing it.
This registration process happens as part of the install.sh script for the support module. It is done by the ibek support generate-links command.
Here we just need to go ahead and re-run our install.sh script to register the lakeshore340 support YAML that we just created:
cd /workspaces/ioc-lakeshore340/ibek-support
lakeshore340/install.sh 2-6-2
IMPORTANT: since we last built the IOC binary, we have added new support modules into the container image. Therefore we need to rebuild the IOC binary to include these new support modules. This is done by running make in the /epics/ioc folder.
cd /epics/ioc
make
Example IOC instance#
In order to test our Generic IOC we now require an IOC instance to launch it. For this exercise we will build an example instance right into the Generic IOC. This is a great way to allow developers to experiment with the container, but it is most likely to require a simulation of some kind to take the place of a real piece of hardware for the instance to talk to.
Before creating the instance it is useful to have a schema for the YAML we are about to write. To generate a schema for this specific Generic IOC perform the following command:
ibek ioc generate-schema > /tmp/ibek.ioc.schema.json
This will make a schema that allows declaration of instances of the
definitions defined in the support YAML file we made above. But ALSO combines
in the definitions from the devIocStats support module and all other
modules that have been built inside this container.
Once this repository is published to GitHub, the schema will be available as part of the release at the following URL:
https://github.com/<YOUR GITHUB ACCOUNT>/ioc-lakeshore340/releases/download/<VERSION TAG>/ibek.ioc.schema.json
This would then be the URL you would put at the top of any IOC instances using your released Generic IOC.
To create the instance we create a folder in ioc-examples and create a IOC Instance definition there as follows:
mkdir -p /workspaces/ioc-lakeshore340/ioc-examples/bl16i-ea-ioc-07/config/
cd /workspaces/ioc-lakeshore340/ioc-examples/bl16i-ea-ioc-07/config/
code ioc.yaml
Add the following contents to the new yaml file:
# yaml-language-server: $schema=/tmp/ibek.ioc.schema.json

ioc_name: "{{ ioc_yaml_file_name }}"

description: auto-generated by https://github.com/epics-containers/builder2ibek

entities:
  - type: devIocStats.iocAdminSoft
    IOC: "{{ ioc_name | upper }}"

  - type: asyn.AsynIP
    name: p1
    port: 127.0.0.1:5401

  - type: lakeshore340.lakeshore340
    ADDR: 12
    LOOP: 2
    P: BL16I-EA-LS340-01
    PORT: p1
    SCAN: 5
    TEMPSCAN: 2
    name: lakeshore
The above YAML file declares an IOC instance that has the following 3
entities (which is what we call instances of definitions in ibek):
A devIocStats object that will supply monitoring PVs
An asyn IP port that will be used to talk to the simulator
A lakeshore340 object that will talk to the simulator via the asyn port
This instance is now ready to run inside the developer container. To do so perform the following steps:
cd /epics/support/lakeshore340/etc/simulations/
./lakeshore340_sim.py
Now create a new terminal in VSCode (Terminal -> New Terminal) and run:
ibek dev instance /workspaces/ioc-lakeshore340/ioc-examples/bl16i-ea-ioc-07
cd /epics/ioc
make
./start.sh
If all is well then you should see the IOC start up and connect to the simulator. You will see the simulator logging the queries it receives.
Note
TODO: It is possible to launch the bob file in: /epics/support/lakeshore340/lakeshore340App/opi/bob/lakeshore340.bob to see a GUI for this IOC instance. However, I’m reserving writing about GUI until I have the PVI integration done on this module and we can see the auto-generated GUI.
To investigate what ibek did to make the Generic IOC binary and the
IOC instance files, take a look at the following files.
/epics/runtime- the runtime assets created from a combination of the instance YAML and all the referenced support YAML/epics/ioc/iocApp/Makefile- this picks up the libs and DBDs from the support module builds which record their dbds and libs in:/epics/support/configure/dbd_list/epics/support/configure/lib_list
/epics/ioc/support/configure/RELEASE- a global release file that contains macros for all the support built in the container. This is soft linked toconfigure/RELEASE.localin each support module./epics/support/configure/RELEASE.shell- created along with the global release file. Sets all the release macros as shell environment variables for passing into the ioc startup script./epics/ibek-defs- a folder containing all the support YAML files that were registered by theinstall.shscripts. These are symlinks into the original files in ibek-support/XXX
Note
Because this IOC instance is a copy of a real IOC at DLS it comes
from a builder XML file originally. DLS users with builder beamlines
can use builder2ibek to convert their builder XML files into
ibek YAML IOC instance files. See Builder2ibek Conversion Tool.
Note this is distinct from making support YAML files with
builder2ibek.support.
Experimenting With Changes to the IOC Instance and Generic IOC#
Inside the developer container you can add and remove support, change the IOC instance YAML file and re-build the IOC instance until everything is working as you want it to.
Note that building the IOC binary is required after any change to the set of support modules inside this container. However it is not required after changes to the IOC instance YAML file. If you want to change the instance you can:
edit the YAML file
stop the IOC with
ctrl-din the ioc shellstart the IOC with
./start.sh
Wrapping Up#
For the final step we will get the Generic IOC container image published to GHCR. This means committing all our changes and pushing them up to GitHub so that the Continuous Integration system can build the container image and publish it.
Before we do that we need to make sure our changes we have manually made inside the developer container will be applied at container build time. There is one thing we have done that is not yet added to the Dockerfile. That is the building of the lakeshore support module itself. Therefore we need to add the following lines to the Dockerfile just after the install of the asyn and StreamDevice support modules:
COPY ibek-support/lakeshore340/ lakeshore340/
RUN lakeshore340/install.sh 2-6-2
These commands will do the same install we did manually above. They rely on our new additions to the ibek-support submodule which shows that it is important to commit the submodule changes first before we push ioc-lakeshore340 repository to GitHub.
Perform the following commands to commit and push the changes:
cd /workspaces/ioc-lakeshore340/ibek-support
git checkout -b my-lakeshore-branch # create a new branch for your changes
git add .
git commit -m "add lakeshore340 support module"
git push -u origin my-lakeshore-branch

# now we can push up the ioc-lakeshore340 repository
cd /workspaces/ioc-lakeshore340
git add .
git commit -m "add lakeshore340 support module and dependencies"
# we are pushing to the main branch here - which is OK for a tutorial
# but in a real project you would use a feature branch and a pull request
git push
This should trigger a build of the container image in the GitHub Actions CI system. You can watch this by clicking on the Actions tab in your new repository.
Assuming the above CI was successful, you now can tag your repository. This will trigger another build and publish the container image to GHCR. The recommended way do this by clicking on the Releases tab in your new repository and then clicking on Create a new release.
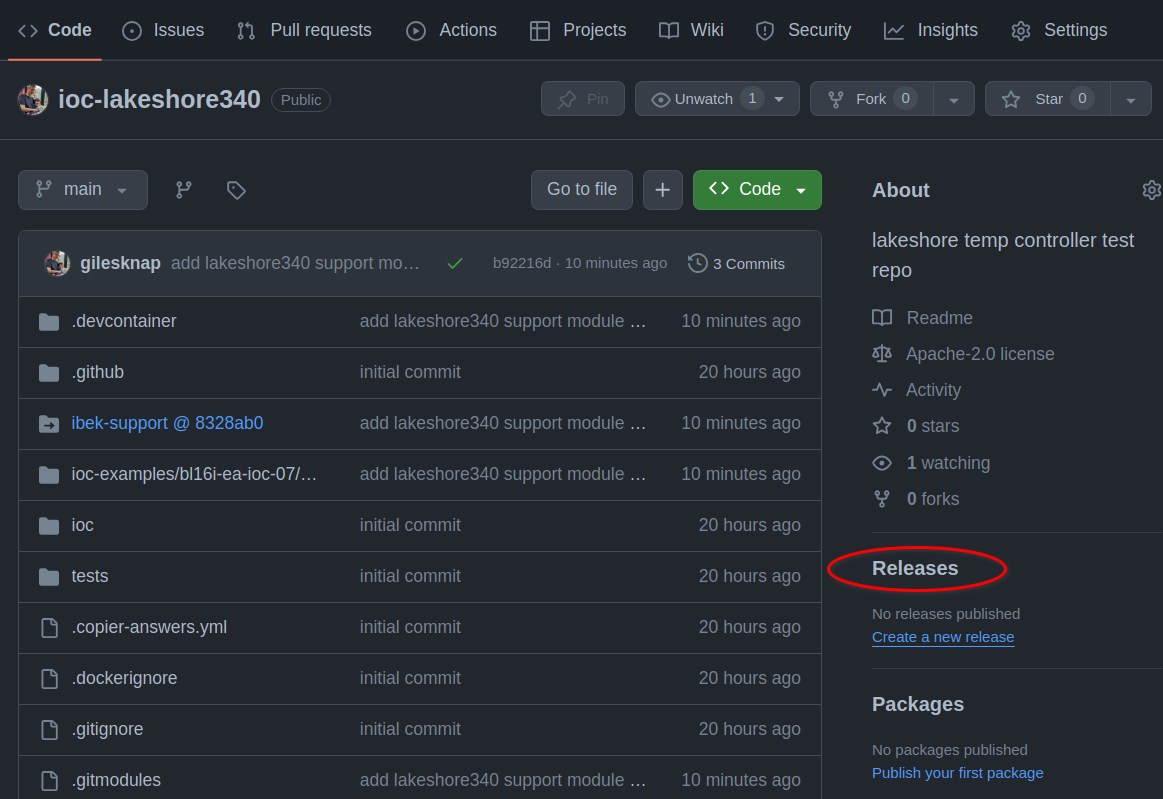
Create a new release on GitHub#
On the New Release page, choose a tag, eg. 0.1.0, click Generate release notes, Add your own description to the notes if desired and then click Publish release.
You can follow along with the CI build by clicking the actions tab in your repository. Once the build is complete you can see the container image in the packages area of your repository. To see your packages, choose the following URL:
https://github.com/orgs/YOUR_GITHUB_ACCOUNT/packages?repo_name=ioc-lakeshore340
EXERCISE#
Now you have a published Generic IOC container image for ioc-lakeshore340. See if you can add an IOC instance that uses this into your bl01t beamline. You should then be able to run up your IOC instance with ec deploy-local. You could also run a local version of the simulator and see if you can get the IOC to talk to it.