Create an IOC Instance#
Introduction#
The last section covered deploying and managing the example Instance that came with the template beamline repository. Here we will create a new IOC Instance that implements a simulated detector.
For this tutorial some familiarity with the EPICS AreaDetector framework is useful. Take a look at this documentation if you have not yet come across AreaDetector: https://areadetector.github.io/master/index.html.
Create a New IOC Instance#
To create a new IOC Instance simply add a new folder to the services folder in your beamline repo. The name of the folder will be the name of the IOC. This folder needs to contain these items:
Chart.yaml |
A helm chart description file. |
values.yaml |
A helm chart values override file. The only required field is |
config |
A folder that contains the IOC configuration files. The configuration can take a number of forms listed here. |
Chart.yaml#
The Chart.yaml is a helm chart description file. We will use the same Chart.yaml file for all IOC instances in the beamline repository. It is a boilerplate file that defines a chart with nothing in it except for two dependencies in the form of sub-charts. The sub-charts are defined within the same repository as follows:
helm/shared |
A sub-chart that contains the default values.yaml file for all services in the beamline repository. It in turn references a further sub-chart that consumes these values: the |
include/iocs |
A sub-chart that transforms the IOC Instance’s config folder files into a Kubernetes ConfigMap to be included in the manifest and mounted into the Generic IOC container at runtime. |
Because all IOC Instances in the beamline repository share the same Chart.yaml file, we will create a soft-link to it in the IOC Instance folder. This is so that updates to the Chart.yaml file will propagate to all IOC Instances in the beamline. To do this run the following command:
cd bl01t # if not already there
# create the new IOC Instance folder
mkdir services/bl01t-ea-test-02
# link in the shared Chart.yaml file
ln -sr include/iocs/Chart.yaml services/bl01t-ea-test-02/Chart.yaml
values.yaml#
The values.yaml file is where we will override the default values for the helm chart. The only required field is image which determines which Generic IOC container the IOC Instance will run in. However, any other fields in the helm chart values file can be overridden on a per IOC instance basis in this file. See the shared values.yaml file in the helm/shared folder for a complete list of fields that can be overridden.
cd bl01t # if not already there
code services/bl01t-ea-test-02/values.yaml
You will now have vscode and open and editing the values.yaml file. Add the following:
shared:
  ioc-instance:
    image: ghcr.io/epics-containers/ioc-adsimdetector-linux-runtime:2024.2.1
This tells the IOC Instance to run in the ioc-adsimdetector-linux-runtime
container. This container was built by the Generic IOC source repo here
epics-containers/ioc-adsimdetector. The container has
support for AreaDetector and ADSimDetector compiled into its IOC binary.
Generic IOCs have compiled IOC binaries and dbd files but no startup script or EPICS database. The compiled IOC binary, dbds and support lib files are baked into the container at container build time. This means that the code for making IOC instances for a given class of device need only be compiled once and can be reused by many IOC Instances.
A startup script and EPICS Database must be provided by the IOC Instance at container run time. This is what makes a unique IOC Instance from a Generic IOC container.
Therefore, we need to create an EPICS startup script and EPICS Database to make this into a functional IOC Instance. To do that we will use ibek. To recap, we have two python CLI tools for supporting epics-containers:
ecA CLI for outside of the container see edge-containers-cliibekA CLI for inside of the container see ibek
ibek is already installed inside of the Generic IOC container we selected above. So now we will provide an IOC yaml file to ibek so that it will generate startup assets for our IOC Instance.
config#
The config folder can contain a variety of different files as listed here. In this case we are going to define the Instance using an ibek IOC instance yaml file.
IOC yaml files are a sequence of entities. Each entity is an instance of
a definition declared in the Support yaml that one of the support
modules provides. definitions can:
add lines of code to the startup script
instantiate EPICS Database templates with a set of macro substitutions
Each entity listed in the IOC yaml file will instantiate an instance of the support module definition that it refers to. It will pass a number of arguments to the definition that will be used to generate the startup script entries and EPICS Database entries for that entity. The definition is responsible for declaring the parameters it expects and how they are used in the script and DB entries it generates. It supplies types and descriptions for each of these parameters, plus may supply default
values.
We will be instantiating a simulation detector from the ioc-adsimdetector Generic IOC. The following Support yaml for the simulation detector is baked into the container:
# yaml-language-server: $schema=https://github.com/epics-containers/ibek/releases/download/1.1.0/ibek.support.schema.json

module: ADSimDetector

defs:
  - name: simDetector
      description: |-
      Creates a simulation detector

    args:
    - type: str
        name: P
        description: Device Prefix
    - type: str
        name: R
        description: Device Suffix
    - type: id
        name: PORT
        description: Port name for the detector
    - type: str
        name: TIMEOUT
        description: Timeout
        default: "1"
    - type: str
        name: ADDR
        default: "0"
        description: Asyn Port address
    - type: int
        name: WIDTH
        default: 1280
        description: Image Width
    - type: int
        name: HEIGHT
        default: 1024
        description: Image Height
    - type: int
        name: DATATYPE
        description: Datatype
        default: 1
    - type: int
        name: BUFFERS
        description: Maximum number of NDArray buffers to be created for plugin callbacks
        default: 50
    - type: int
        name: MEMORY
        description:
        Max memory to allocate, should be maxw*maxh*nbuffer for driver and
        all attached plugins
        default: 0

    databases:
    - file: $(ADSIMDETECTOR)/db/simDetector.template
        args:
        P:
        R:
        PORT:
        TIMEOUT:
        ADDR:

    pre_init:
    - type: text
        value: |
        # simDetectorConfig(portName, maxSizeX, maxSizeY, dataType, maxBuffers, maxMemory)
        simDetectorConfig("{{PORT}}", {{WIDTH}}, {{HEIGHT}}, {{DATATYPE}}, {{BUFFERS}}, {{MEMORY}})
You can see that this lists a number of arguments that it expects. It then declares how these will be used to substitute values into the simDetector database template. Finally it declares some lines to go into the startup script (before iocInit).
Note that the process for turning this Support yaml with values from IOC yaml into a startup script and EPICS Database uses Jinja2 templating. In its simplest form this just means that you can use {{ }} to substitute values from the IOC yaml arguments into the Support yaml pre_init and databases sections. When the database section provides no value for the parameters it lists this means that the argument is used verbatim, e.g. $(ADSIMDETECTOR)/db/simDetector.template is instantiated with PORT=$(PORT), P=$(P) etc.
Therefore, we can create an IOC yaml file that instantiates a simulation detector as follows:
mkdir services/bl01t-ea-test-02/config
code services/bl01t-ea-test-02/config/ioc.yaml
This should launch vscode and open the ioc.yaml file. Add the following:
# yaml-language-server: $schema=https://github.com/epics-containers/ioc-adsimdetector/releases/download/2024.1.1/ibek.ioc.schema.json

ioc_name: "{{ __utils__.get_env('IOC_NAME') }}"
description: Example simulated camera for BL01T

entities:
  - type: ADSimDetector.simDetector
    PORT: DET.DET
    P: BL01T-EA-TST-02
    R: ":DET:"
Note
If you are unfamiliar with YAML then you could take a look at the YAML spec here: https://yaml.org/spec/1.2.2/.
Be aware that white space is significant. i.e. indentation represents
nesting. Above we have a list of entities, each list item is denoted by
-. There is currently a single entry in the list which is a dictionary
of key value pairs. The first key is type and the value is
ADSimDetector.simDetector.
This will create us a simulation detector driver with PV prefix
BL01T-EA-TST-02:DET: that publishes its output on the Asyn port DET.DET.
Note that the Generic IOC includes all of the support modules that are dependencies
of ADSimDetector and each of those contributes its own set of definitions in its
own Support yaml file. Let us also add an AreaDetector plugin and wire
it to our simulation detector by adding this to our IOC yaml file:
- type: ADCore.NDPvaPlugin
  PORT: DET.PVA
  PVNAME: BL01T-EA-TST-02:PVA:OUTPUT
  P: BL01T-EA-TST-02
  R: ":PVA:"
  NDARRAY_PORT: DET.DET
This adds a PVA plugin to the IOC that will publish the output of the simulation
detector over a PVAccess channel called BL01T-EA-TST-02:PVA:OUTPUT. The
Support yaml that declared that plugin came from the ADCore module. This is
a dependency of ADSimDetector and so is included in the Generic IOC container.
Try putting the two snippets of IOC yaml together and saving it as
ioc.yaml in the services/bl01t-ea-test-02/config folder.
You have now defined your first IOC instance.
Trying Out The IOC Instance#
Launch the IOC Instance#
To deploy the IOC Instance execute these commands (the first 3 commands are a reminder of how to set up your shell - from now on this will be assumed):
# These 3 commands set up your environment if you have not already done so
cd bl01t
source $HOME/ec-venv/bin/activate
source bl01t

# deploy the new IOC from local filesystem
ec deploy-local services/bl01t-ea-test-02

# verify that your IOC worked by looking at the logs
ec logs bl01t-ea-test-02
Operator Interface#
In later tutorials we will look at auto-generation of OPI files and using Phoebus to interact with IOC Instances. To keep this tutorial to a reasonable we will interact with the IOC using caput / caget.
Viewing IOC output#
Our detector output is available over PVAccess since we added the PVA plugin.
We can view it using the c2dv tool. These commands will install c2dv
and launch it to view the IOC output:
pip install c2dataviewer
c2dv --pv BL01T-EA-TST-02:PVA:OUTPUT &
Now we can start our simulation detector like this:
ec exec bl01t-ea-test-02
# enable the PVA plugin that publishes the output
caput BL01T-EA-TST-02:PVA:EnableCallbacks 1
# start the simulation detector
caput BL01T-EA-TST-02:DET:Acquire 1
You should see a moving image appear in the c2dv window. For smoothest
results you may want to hit Auto in the Image and Zoom section of the
c2dv window and set Requested Frame Rate to a high value.
Notice that we did the caput inside the IOC container. This is because you
are guaranteed to have caput there. If you have EPICS
installed on your host machine you could omit entering the container.
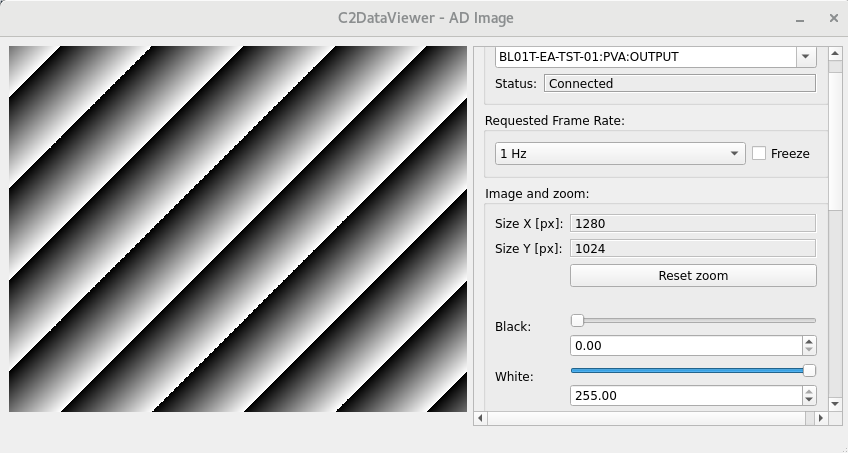
the c2dv viewer showing an image from the example IOC#
ibek Explanation#
Above we looked at some ibek Support yaml and created an IOC yaml file. The details of where Support yaml files come from and how to create your own are covered a later tutorial Create a Generic IOC.
However, without looking into the set of Support yaml files that are inside a given Generic IOC we can still make a meaningful IOC yaml file. That is because every Generic IOC publishes an IOC schema that describes the set of entities that an instance of that IOC may instantiate.
The Generic IOC we used was released at this location:
epics-containers/ioc-adsimdetector.
This page includes the assets that are published as part of the release and
one of those is ibek.ioc.schema.json. This is the IOC schema for the
ioc-adsimdetector Generic IOC. This is what we referred to at the top of
our IOC yaml file like this:
# yaml-language-server: $schema=https://github.com/epics-containers/ioc-adsimdetector/releases/download/2024.1.1/ibek.ioc.schema.json
When editing with a YAML aware editor like VSCode this will enable auto completion and validation of the IOC yaml file. To enable this in VSCode you will need to install the YAML extension from here: https://marketplace.visualstudio.com/items?itemName=redhat.vscode-yaml
Now is a good time to try installing the extension and experimenting with editing the IOC yaml file.
Using ibek yaml files to describe IOC instances has the following advantages:
there is pre-runtime checking that the IOC Instance is valid
instance authors are guided by schema
details of what a support module needs to be instantiated are under the control of the support module author (at Generic IOC specification time).
functions with long argument lists are made easier to use because the instance author supplies named arguments only.
However, if you already have a framework for generating startup assets or you prefer hand coding them, this is also supported.
Raw Startup Script and Database#
This section demonstrates how to use your own startup assets. This involves
placing your own st.cmd and ioc.subst files in the config
folder. Or alternatively you could override behaviour completely by placing
start.sh in the config folder, this can contain any script you like.
To see what ibek generated you can go and look inside the IOC container:
ec exec bl01t-ea-test-02
cd /epics/runtime/
cat ioc.subst
cat st.cmd
Note
The startup script and database are generated at container run time,
by ibek. They are generated in the /epics/runtime folder
of the container.
In Kubernetes this will be a persistent volume so that it can be
shared for easy debugging of IOC Instances.
If you would like to see an IOC Instance that uses a raw startup script and database then you can copy these two files out of the container and into your IOC Instance config folder like this (replace podman with docker if that is what you are using):
podman cp bl01t-ea-test-02:/epics/runtime/st.cmd services/bl01t-ea-test-02/config
podman cp bl01t-ea-test-02:/epics/runtime/ioc.subst services/bl01t-ea-test-02/config/ioc.subst
# no longer need an ibek ioc yaml file
rm services/bl01t-ea-test-02/config/ioc.yaml
You will need to make a minor change to the ioc.subst file. Edit this and remove references to the two template files with .pvi in their name. These are PVI generated templates for use with BlueSky Asyc and are not available in manually build IOC Instances.
Your IOC Instance will now be using the raw startup script and database. But should behave exactly the same as before. You are free to experiment with changes in the startup script and substitution file and re-deploy the IOC.
To start your new version of the the Instance and replace the previous one use the deploy-local command again:
# re-deploy from local filesystem
ec deploy-local services/bl01t-ea-test-02
Note
We used some raw podman / docker commands in the above script. If you
want to know what commands ec is running under the hood then you can
use the -v option to see them.
For example try this command:
ec -v ioc deploy-local services/bl01t-ea-test-02